
Building a Military - Chapter 3 (Tactical Training)
This chapter is dedicated to the use of tactical training to prepare troops for combat. The uses of military-style combat tactics on most of the Halo series games can be very useful if used correctly, unfortunately in the past it has been poorly indoctrinated and many claimed they used "tactics" when really they were only advertising their clan. The field of "military combat tactics" is much too widespread to describe every detail, so I will only cover the tactics that are applicable to Halo, and the ones I have taught over the years of running clans. The below training guides are designed to meet a multitude of situations that may arise during a combat scenario.
SQUAD MOVEMENT/TACTICS
SQUAD MOVEMENT/TACTICS
FIRE TEAM MANEUVER:
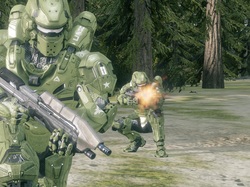
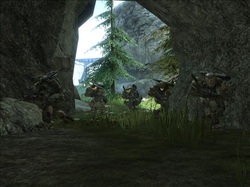
To move a squad from one place to another in a combat situation, you'll need one or two of the squad members to take point (the most frontal position) where they can move ahead and call back to the remaining squad members. Half the squad moves up a distance while the rest holds position, each time one half moves up the other is "covering" their movement in case it comes under fire. Once the forward half of the squad halts, the rear half of the squad will move up to or past the halted squad's position while being covered by them. This process is repeated from cover to cover or distance to distance, and is widely known as the "cover-fire" or "fire-team" tactic. Call out commands can be included in this process to enhance communications between squad members, but remember in a larger game there will already be microphone chatter and there may be multiple squads, so teaching troops to perform this maneuver with limited communication is quite necessary. The purpose of this tactic is to move a squad from one position to another in the safest manner, while in an area of dense cover or likely outbreak of a firefight/nearing the target location where hostiles are present.
COMMANDS: (FORM UP, COVERING, MOVING, HOLD POSITION, FALL BACK)
LINE:
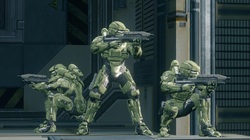
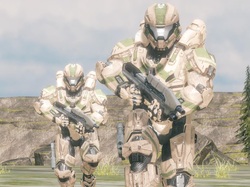
Used when all firepower must be brought to the front, for example when defending a fortress wall, or while moving up and overwhelming the enemy. This maneuver is simple yet effective, however it is vulnerable to attack from the flanks (sides) and should only be used when flanks are well guarded or blocked by the natural landscape. This maneuver is in simpler terms, either an open assault or a spread out defense facing only one direction.
COMMANDS: (FORM LINE, FORWARD, HOLD POSITION, FALL BACK, DISPERSE)

FILE/COLUMN:
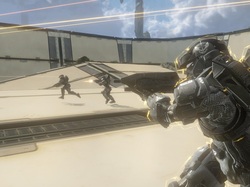
Used in enclosed spaces, such as an alley or while crossing a narrow bridge, or when your squad needs to tuck in close to a wall or mountainside. When using this tactic the pointman (The most frontal unit) should be facing front, leading the way through the area. The quartermaster/rear guard (In basic terms, the guy in the back of the line), should be checking the rear of the squad for potential threats as the unit moves. Every member of the squad in between should be covering the flanks and checking for threats while on the move. This tactic is also the preset formation for breaching and clearing rooms.
COMMANDS: (FORM FILE, FORM COLUMN, MOVE OUT, HOLD POSITION, FALL BACK)
BREACHING AND CLEARING:
This tactic is one of the most commonly taught throughout the militarized clan community. It requires a squad to line up against the side of the door of a building to be entered, and on a command burst through the entrance and "clear" the building of hostiles. This process can then be quickly followed by forming a defensive perimeter to defend the newly taken structure, or by moving on the the next objective. The protocols instilled for this tactic can be altered to meet different situations, but generally the commands are the same.
COMMANDS: (STACK UP/FORM UP, BREACH, ROOM CLEAR, REGROUP)
CORNER TURNING:
This is a simple yet effective tactic when in pairs. It is best used when you and your partner(s) are unsure of activity around a corner, and simply need to check it. It can be done while the rest of the squad moves on, and a pair can perform this action. The idea behind this is to have two squad-members, one crouching closest to the corner, the other standing close behind, to simultaneously turn the corner and therefore double the firepower to quickly kill any hostiles. It is only effective when performed quickly by members who have drilled this tactic, the set up and turn should take no more than 3 seconds... The tactic was first developed in the North Army Command and was dubbed the "Set go" because of the commands used to perform the tactic.
COMMANDS: (SET, GO)
GOING DARK/RADIO SILENCE:
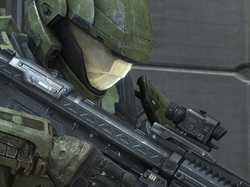
Although simple, this tactic is an effective and commonly used maneuver where the squad members all crouch while moving to prevent radar detection. It's main uses are found in approaching an enemy position/base unseen, or when hiding from searching patrols. Special forces in clans deemed stealth their primary role, and so used this tactic extensively along with active camouflage. Another tactic often associated with going off the radar would be the use of "radio silence", where the squad communicates and moves without speaking to one another. "Going Dark" and "Radio silence" can be used separately or in unison.
COMMANDS: (GO DARK, RADIO SILENCE)
STEP LADDER:
This tactic is often challenging to perform under combat stress, but when used by a well drilled team, it can often be a game changer. The idea is to use the members of the squad to create a "step ladder" for other members to climb over an obstacle/wall and gain a higher advantage or create an entry point into compound. The height of the ladder can vary from just one man to two, three, four, or even five+. In order for this to work, one man must "hug" the wall or obstacle while another jumps onto his head. Then the top man can jump over, however if the obstacle is to tall, there is a two-man+ strategy that may me employed. The base man "hugs" the wall, top man jumps, while top man is midair; base man jumps to meet top man, top man jumps again clearing the obstacle, effectively "double jumping" or "buddy jumping".
COMMANDS: (FORM LADDER, READY, JUMP, CLEARED)
